Firebase - Cloud Storage(web) 공식문서
해당 글은 Firebase V9 버전을 바탕으로 작성된 글입니다.
Firebase Storage 시작하기
- Firebase Console에서 프로젝트로 이동
- 프로젝트의 빌드 > Storage 메뉴로 이동
- Get Started 클릭
Sample
Firebase Storage 사용법을 알아보기 전에 예제를 하나 준비했다. 다음 예제는 이미지를 업로드하고 업로드한 이미지의 정보를 읽을 수 있다.
import React from 'react';
import { useState } from 'react';

const Sample = () => {
  const [attachment, setAttachment] = useState();

  const onFileChange = (evt) => {
    // 업로드 된 file
    const files = evt.target.files;
    const theFile = files[0];

    // FileReader 생성
    const reader = new FileReader();

    // file 업로드가 완료되면 실행
    reader.onloadend = (finishedEvent) => {
      // 업로드한 이미지 URL 저장
      const result = finishedEvent.currentTarget.result;
      setAttachment(result);
    };
    // 파일 정보를 읽기
    reader.readAsDataURL(theFile);
  };

  const onClearAttachment = () => setAttachment(null);

  const onSubmit = (evt) => {
    evt.preventDefault();
  };

  return (
    <form onSubmit={onSubmit}>
      <input type="file" accept="image/*" onChange={onFileChange} />
      {attachment && (
        <div>
          <img src={attachment} width="50px" height="50px" alt="" />
          <button onClick={onClearAttachment}>Clear</button>
        </div>
      )}
      <input type="submit" value="Upload" />
    </form>
  );
};

export default Sample;- file 타입의 input을 준비한다.
accept는 업로드할 파일의 유형을 지정한다.onChange이벤트 리스너로onFileChange를 연결한다.
FileReader를 생성FileReader객체는 업로드 된 파일의 정보를 알 수 있는 브라우저에 내장된 File API이다.
render.onloadend는 file 업로드가 완료되면 실행된다.- 업로드 된 이미지의 URL을 리액트 훅인
useState를 통해attachement변수에 저장한다.- 이미지 URL은 Data URL로 인코딩된 문자열 형태(
readAsDataURL)로 저장된다. - 업로드 된 이미지는 URL(
attachement)을 img 태그의src속성에 넣어준다.
- 이미지 URL은 Data URL로 인코딩된 문자열 형태(
- 업로드한 이미지를 초기화할 수 있는 Clear 버튼을 추가한다.
- onClick 이벤트 리스너에
onClearAttachment함수를 설정한다. onClearAttachment함수는attachement를 초기화한다.
- onClick 이벤트 리스너에
파일 업로드
Firebase 를 사용하기 위한 기본적인 firebaseSDK 세팅이 되어있어야 한다.
Firebase 시작하기 포스팅 참고
공식 문서에 따르면 다음과 같이 파일 이름을 포함해 파일의 전체 경로를 가리키는 참조를 생성하여 사용할 수 있다고 한다. 위의 예제를 통해 직접 작성해보자.
import { getStorage, ref } from 'firebase/storage';

const storage = getStorage();
const mountainsRef = ref(storage, 'mountains.jpg');
파일 업로드 구현
업로드한 파일명 그대로 storage에 업로드할 수 있지만, 파일의 이름은 고유한 이름을 갖는 것이 좋다.
따라서 고유한 식별자를 생성할 수 있는 uuid 라이브러리를 사용할 것이다.
사용법은 import 후 해당 모듈을 호출하기만 하면 된다. 다음 예제 코드에서 확인해보자.
import { getStorage, ref } from 'firebase/storage';
import { v4 as uuidv4 } from 'uuid'; // 랜덤 식별자를 생성해주는 라이브러리

// ...

const onSubmit = (evt) => {
  evt.preventDefault();
  const storage = getStorage();
  const fileRef = ref(storage, uuidv4());
};
기본 문법에 따라 파일 이름과 경로를 가리키는 참조(fileRef)를 생성한다.
만약 파일을 어떤 디렉터리 내에 저장하고 싶다면 경로를
ref(storage, '디렉터리명/파일명');형태로 작성할 수 있다.
추가로 attachment에 저장한 이미지 url 이 Data URL 형태의 문자열이므로 문자열에 맞는 업로드 방식을 사용할 수 있도록 코드를 작성해야한다.
이는 uploadString 메서드를 사용해 인코딩된 문자열 url 에 따라 타입을 지정해 업로드할 수 있다.
import { getStorage, ref, uploadString } from 'firebase/storage';

// ...
const onSubmit = async (evt) => {
  evt.preventDefault();
  const storage = getStorage();
  const fileRef = ref(storage, uuidv4());
  const response = await uploadString(fileRef, attachment, 'data_url');
  console.log(response);
};-
uploadString모듈을 import 한다.- 첫번째 인자로 참조(
fileRef) - 두번째 파라미터로 이미지 url
- 세번째 인자로 url 타입을 전달한다.
- 첫번째 인자로 참조(
-
uploadString는 프로미스이므로 asnyc/await를 통해 동기적으로 사용한다. -
response 를 출력해보자! 다음 이미지와 같이 출력되면 성공적으로 업로드 된 것이다.
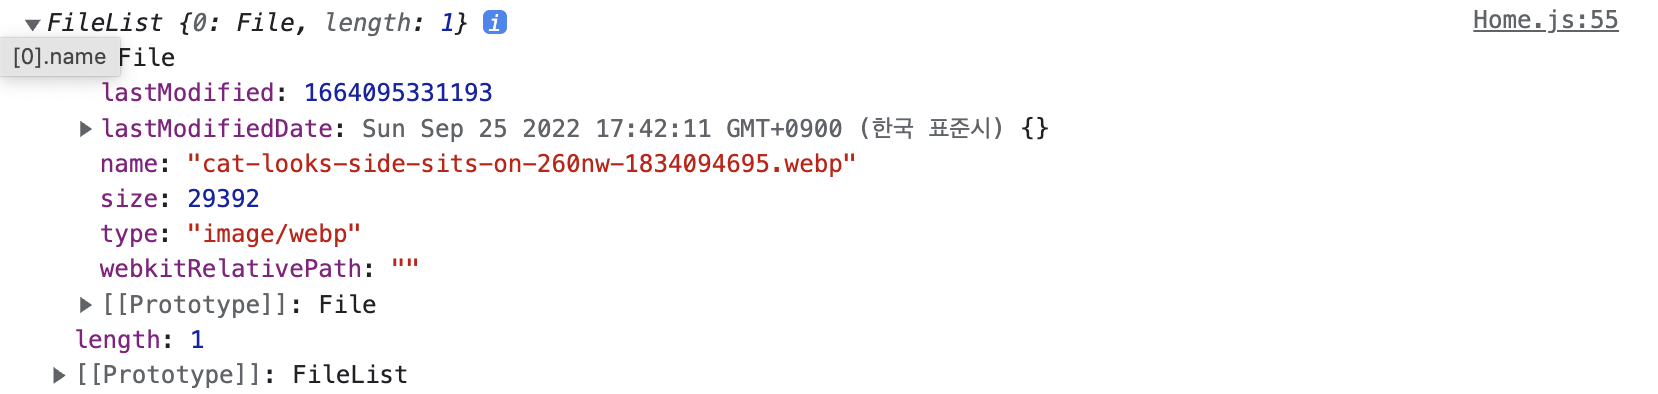 response를 출력한 결과
-
Firebase 에서도 확인해보자.
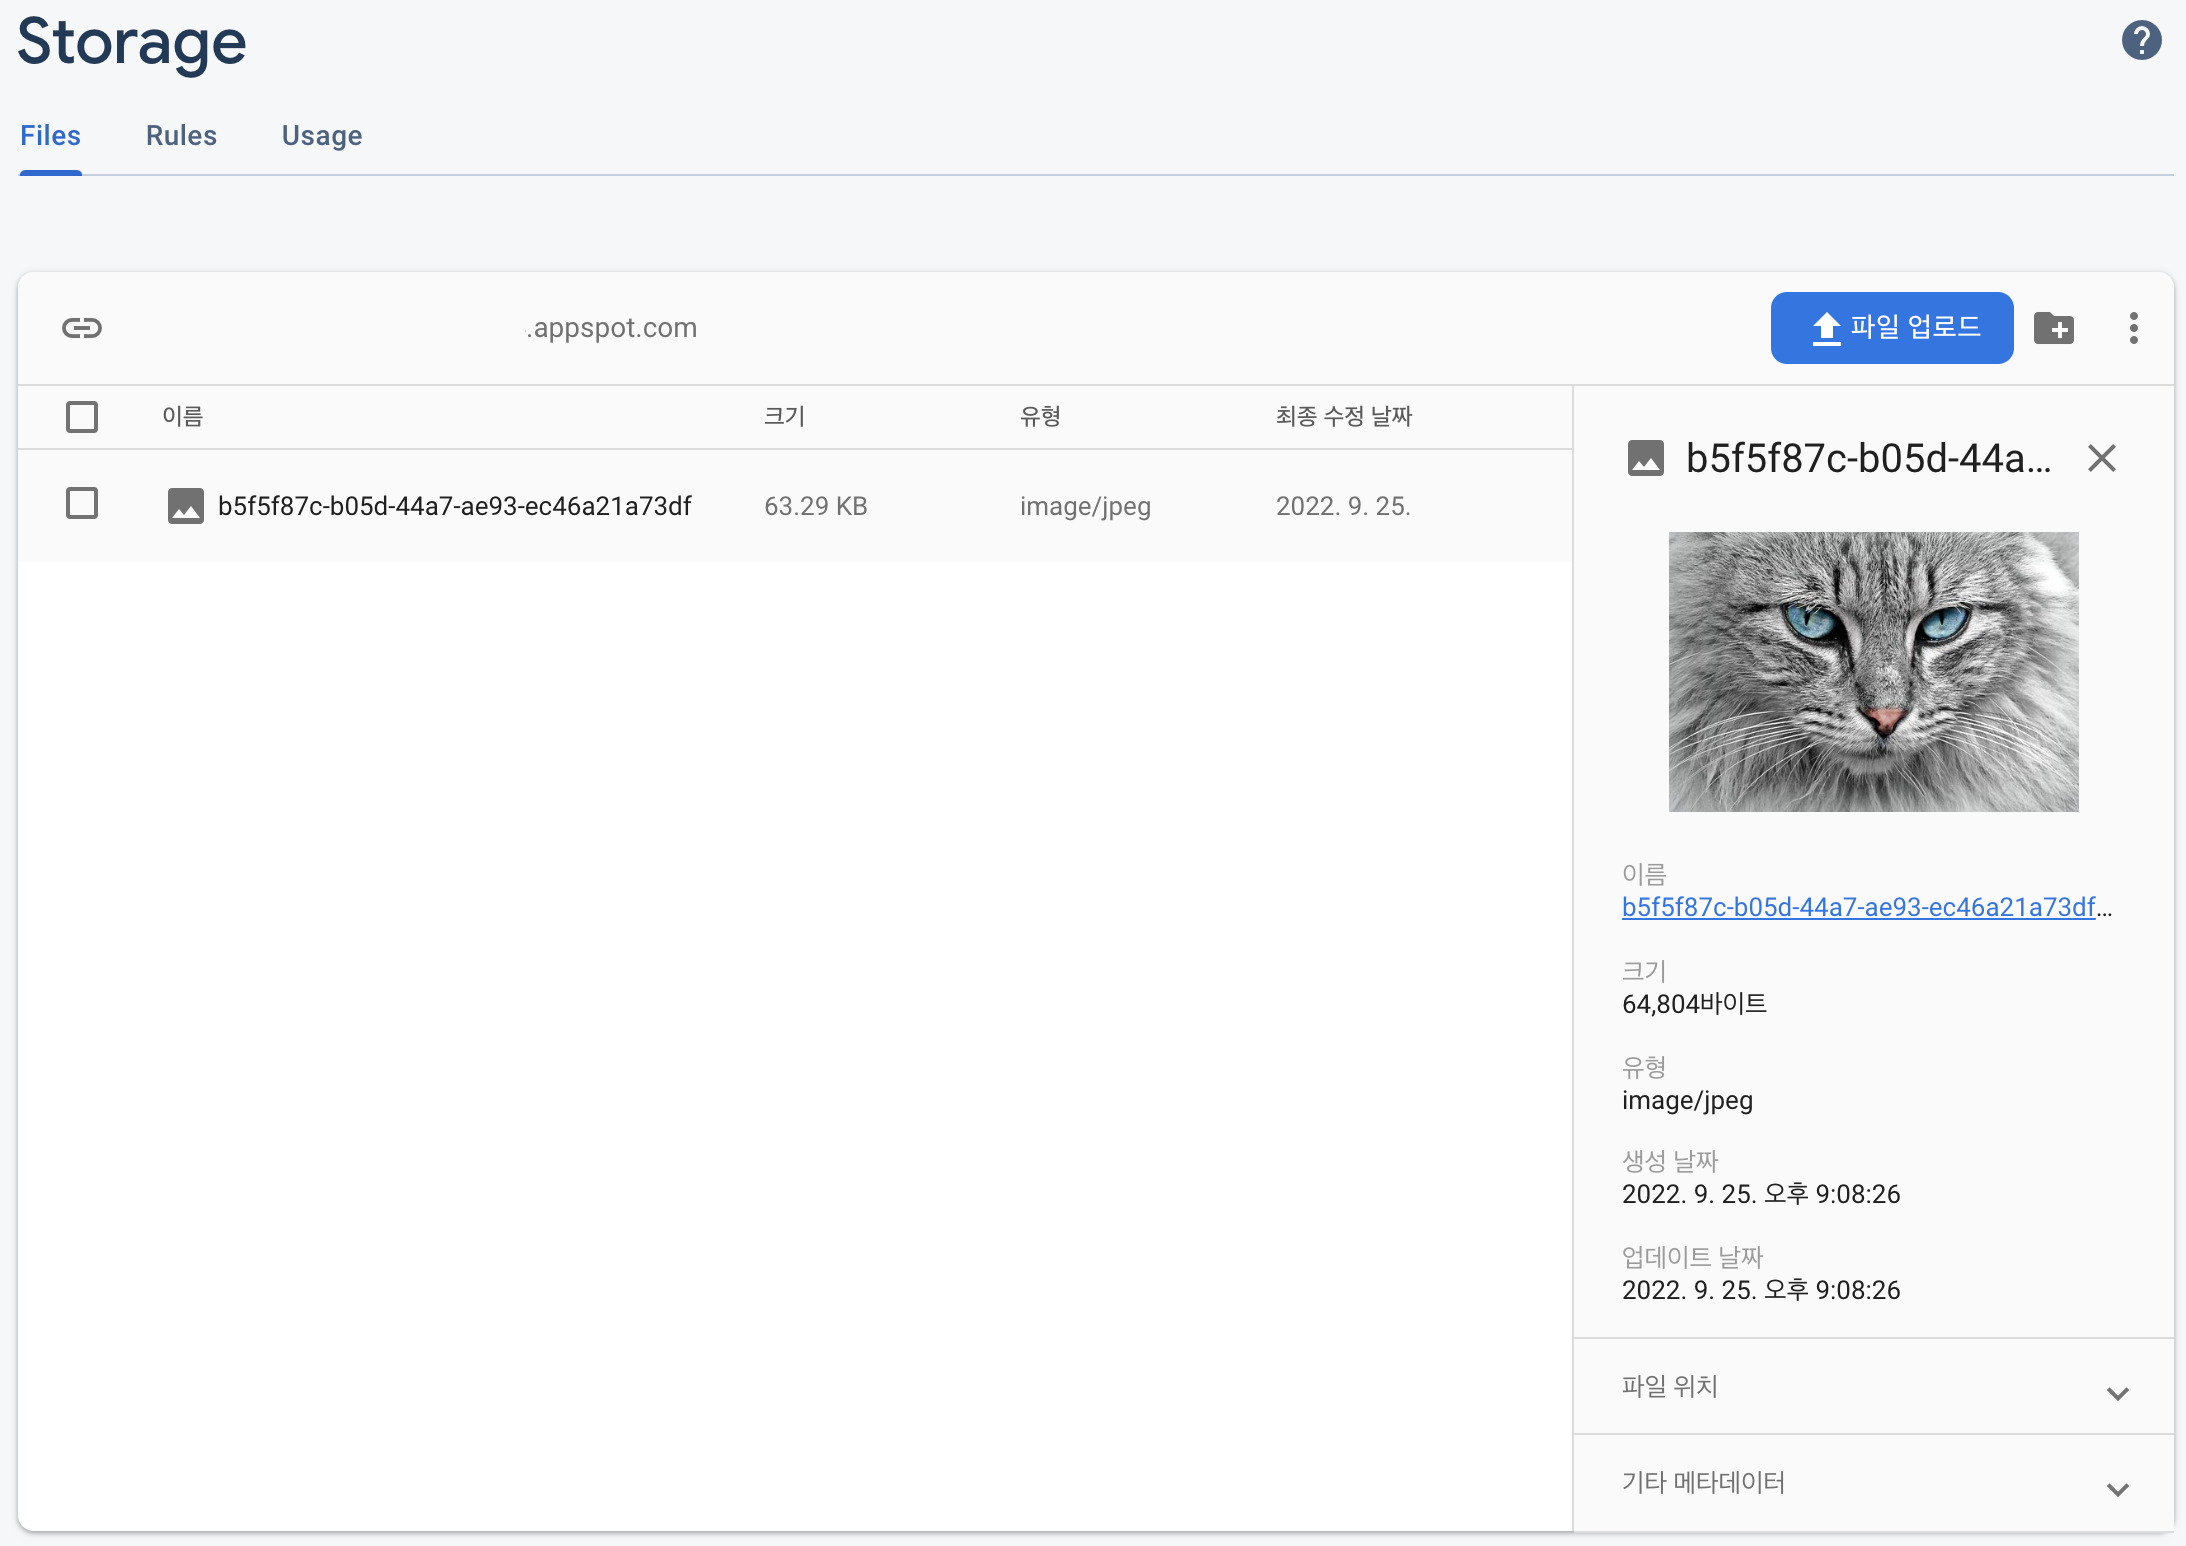
파일의 이름이 랜덤한 문자열로 지정된 것과 크기, 유형, 생성 날짜, 업데이트 날짜 까지 상세히 기록된 것을 확인할 수 있다.
[에러] Firebase Storage: User does not have permission ~
다음과 같은 에러 발생 시 Firebase Storage의 Rules 탭에서 규칙을 수정해주면 해결된다.
Uncaught (in promise) FirebaseError: Firebase Storage: User does not have permission to access '[storageBucket]'
수정 전
rules_version = '2';
service firebase.storage {
  match /b/{bucket}/o {
    match /{allPaths=**} {
      allow read, write: if false;
    }
  }
}
수정 후
rules_version = '2';
service firebase.storage {
  match /b/{bucket}/o {
    match /{allPaths=**} {
     allow read;
     allow write: if request.auth != null;
    }
  }
}
파일 다운로드
파일 다운로드는 매우 간단하게 수행할 수 있다.
import { getStorage, ref, uploadString } from 'firebase/storage';

// ...
const onSubmit = async (evt) => {
  evt.preventDefault();

  /* 파일 업로드 */
  const storage = getStorage();
  const fileRef = ref(storage, uuidv4()); // 파일 참조 생성
  const response = await uploadString(fileRef, attachment, 'data_url');

  /* 파일 다운로드 */
  const fileURL = await getDownloadURL(ref(storage, fileRef));
  console.log(fileURL);
};firebase/storage로부터 getDownloadURL과 ref 모듈을 불러온 후,
getDownloadURL의 인자로 ref를, ref의 인자로 storage와 위에서 생성한 참조를 전달하면 해당 이미지를 다운로드 할 수 있는 url을 반환한다.
파일 삭제
import { deleteObject, ref } from 'firebase/storage';

const storage = getStorage();
const desertRef = ref(storage, fileURL); // 파일 참조 생성

deleteObject(desertRef);
파일 삭제 또한 삭제할 파일 참조(desertRef)를 생성하고 deleteObject의 인자로 생성한 참조를 전달하면 끝이다. 이제 Firebase Storage 에서 해당 파일이 삭제된 것을 확인할 수 있을 것이다.