사용하게 된 배경
이번에 투입된 프로젝트는 OTT 형태의 TV 웹앱 서비스로 넷플릭스, 네이버 시리즈, 유튜브, … TV 앱과 같은 동작을 구현하기 위해 Spatial-Navigation 라이브러리를 도입하게 되었고, 사용해본 경험을 토대로 사용법을 공유하려고 한다.
개발환경은 리액트와 타입스크립트다. 리액트 환경에서 사용할 수 있는 라이브러리인 react-spatial-navigation에서는 타입스크립트가 지원되지 않기 때문에 해당 라이브러리를 마이그레이션한 Norigin-Spatial-Navigation을 사용해야 한다.
사전 준비
1. Typescript CRA 생성
npx create-react-app <project-name> --template typescript2. Spatial-Navigation 설치
생성한 프로젝트 디렉터리로 이동해 Spatial-Navigation 라이브러리 설치.
본인은 styled-components 도 같이 설치함. yarn add styled-components @types/styled-components
cd <project-name>
yarn add @noriginmedia/norigin-spatial-navigation
프로젝트 구조
├── 📁 node_modules
├── 📁 public
├── 📁 src
│   ├── 📁 components
│   │   ├── SideNav.tsx
│   │   ├── SideNavItem.tsx
│   │   ├── Gallery.tsx
│   │   └── GalleryItem.tsx
│   ├── App.tsx
│   └── ...
├── .gitignore
├── package-lock.json
├── package.json
├── README.md
└── yarn.lock
예제 레이아웃 & 소스코드
예제의 소스코드는 여기에서 확인할 수 있습니다.
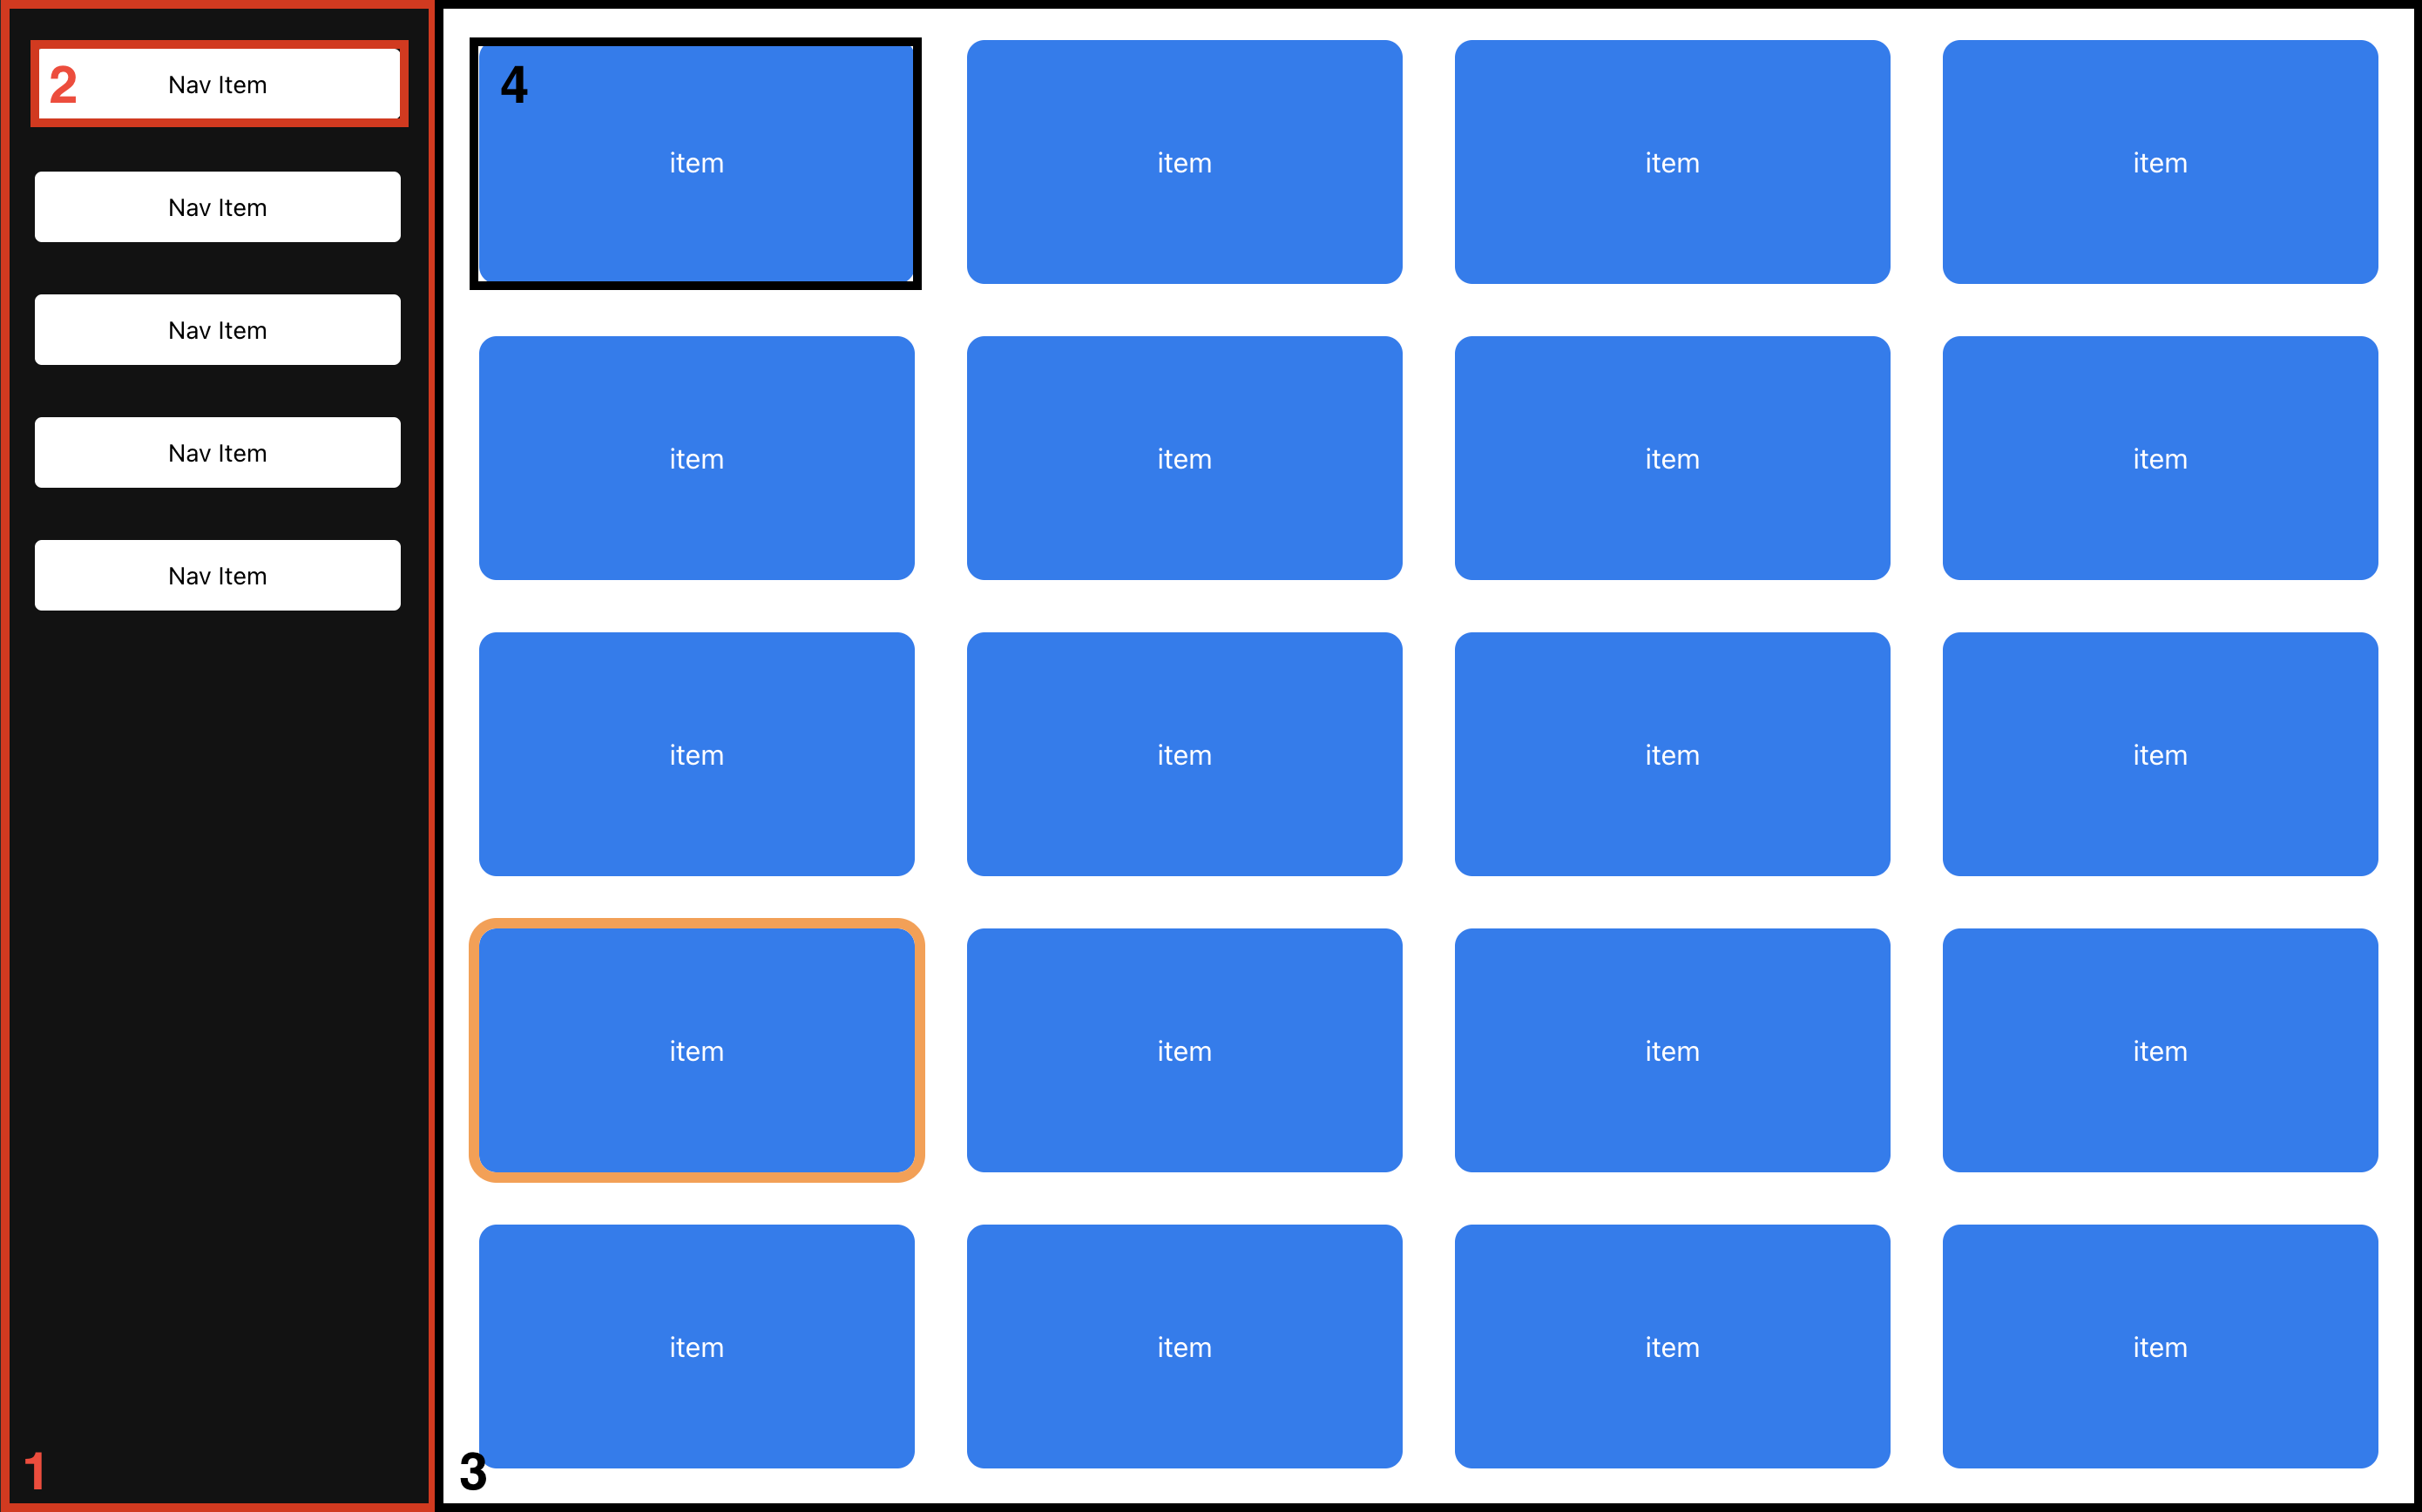
컴포넌트는 총 4개로 구성되었습니다.
- SideNav
- SideNavItem
- Gallery
- GalleryItem

구현 순서
- Spatial-Navigation 초기화
- focus가 필요한 컴포넌트에 focusable 등록
- 수동으로 focuse 설정
- 자식 컴포넌트 focusable 등록
Spatial-Navigation 초기화
roote 컴포넌트(App.tsx)에서 spatial navigation을 초기화합니다.
...
import { init } from "@noriginmedia/norigin-spatial-navigation";
init();

function App(){ return ... }
export default App;
init 옵션을 설정할 수 있습니다. 자주 쓰였던 옵션은 debug 와 visualDebug 가 있습니다.
debug: 콘솔 로그를 통해 정보를 확인할 수 있습니다.visualDebug: focusable 로 등록된 요소들과 포커스 이동현황을 시각적으로 확인할 수 있습니다.
init({ debug: true, visualDebug: true });focus가 필요한 컴포넌트에 focusable 등록
컴포넌트를 포커스할 수 있도록 등록하기 위해서는 FocusContext와 useFocusable 을 import 해옵니다.
FocusContext 는 포커스 할 자식요소가 있는 컨테이너로 Provider 를 통해 부모 포커스 키 역할을 합니다.
import { FocusContext, useFocusable } from '@noriginmedia/norigin-spatial-navigation';
import NavItem from './NavItem';

const SideNav = () => {
  const { ref, focusKey } = useFocusable();
  const items = new Array(5).fill(''); // 예시를 위한 아이템

  return (
    <FocusContext.Provider value={focusKey}>
      <SideNavContainer ref={ref}>
        {items.map((item, i) => (
          <NavItem key={i} />
        ))}
      </SideNavContainer>
    </FocusContext.Provider>
  );
};-
useFocusableHook를 선언하고 포커스 대상이 될 요소에ref를 등록합니다.SideNavContainer에 ref 등록
-
FocusContext.Provider로 컴포넌트들을 Wrapping 합니다.-
FousContext 에는 value 값 을 필수로 전달해야합니다.
-
value 는 focusKey를 전달합니다.
- focusKey는 자동으로 지정되지만 직접 설정할 수도 있습니다.
const { ref, focusKey } = useFocusable({
	focuseKey: 'item-focus"
});
-
위의 코드를 기준으로 페이지에서 SideNav → SideNavContainer → NavItem 으로 포커스를 전파합니다.
수동으로 focus 설정하기
useFousable Hook을 사용해 수동으로 포커스 설정을 할 수 있습니다. useEffect Hook을 활용해 페이지 렌더 시 default로 포커스 될 요소를 설정해야 하는 상황에 유용하게 사용될 수 있습니다.
- setFocus 의 인자로 focusKey 를 전달하는 방법
const { ref, setFocus, focusKey } = useFocusable();
setFocus(focusKey);- focusSelf 를 호출하는 방법
const { ref, focusSelf, focusKey } = useFocusable();
useEffect(() => {
  focusSelf();
}, [focusSelf]);
본 예제에서는 페이지 렌더 시 SideNav 컴포넌트의 NavItem 을 디폴트로 포커스하도록 설정했습니다.
import { FocusContext, useFocusable } from '@noriginmedia/norigin-spatial-navigation';
import { useEffect } from 'react';

const SideNav = () => {
  const { ref, focusSelf, focusKey } = useFocusable();

  useEffect(() => {
    focusSelf();
  }, []);

  return (
    <FocusContext.Provider value={focusKey}>
      <SideNavContainer ref={ref}>
        {items.map((item, i) => (
          <NavItem key={i} />
        ))}
      </SideNavContainer>
    </FocusContext.Provider>
  );
};
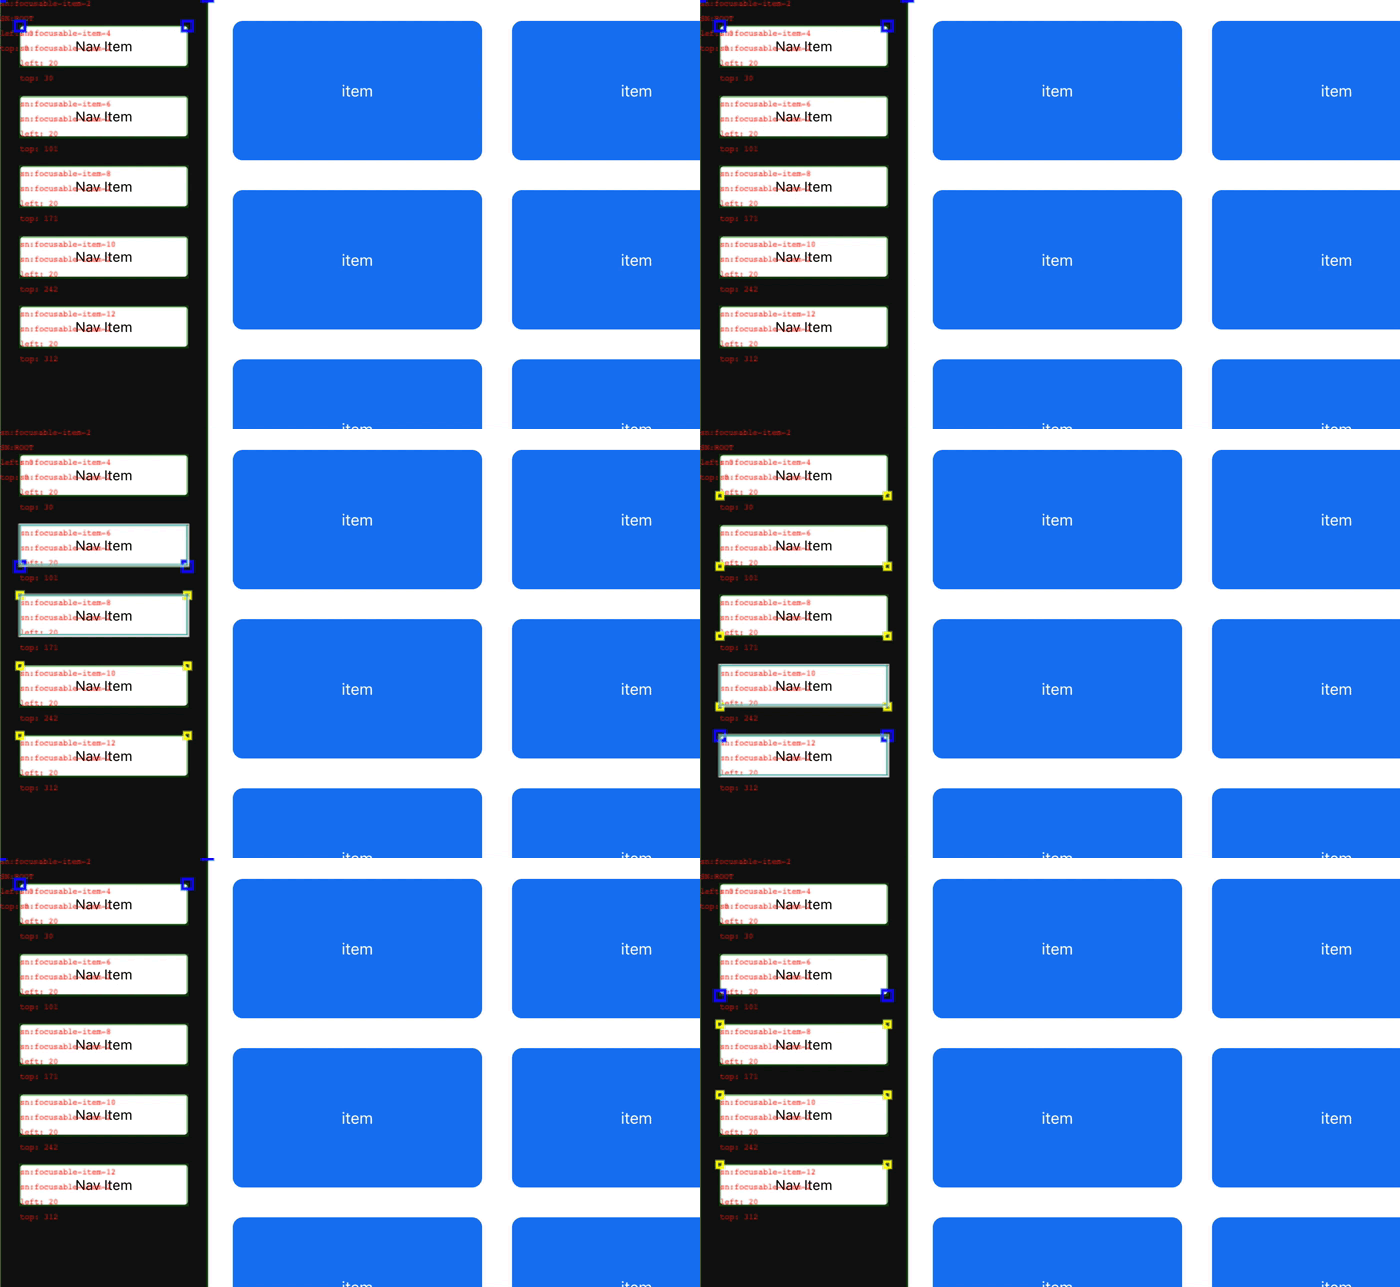
자식 컴포넌트도 위와 같은 방식으로 작성하면 이렇게 방향키로 포커스가 가는 모습을 확인할 수 있습니다.

visualDebug 모드에서 확인한 모습
옆의 그리드 영역도 동일하게 작업해줍니다.
기타 API 사용해보기
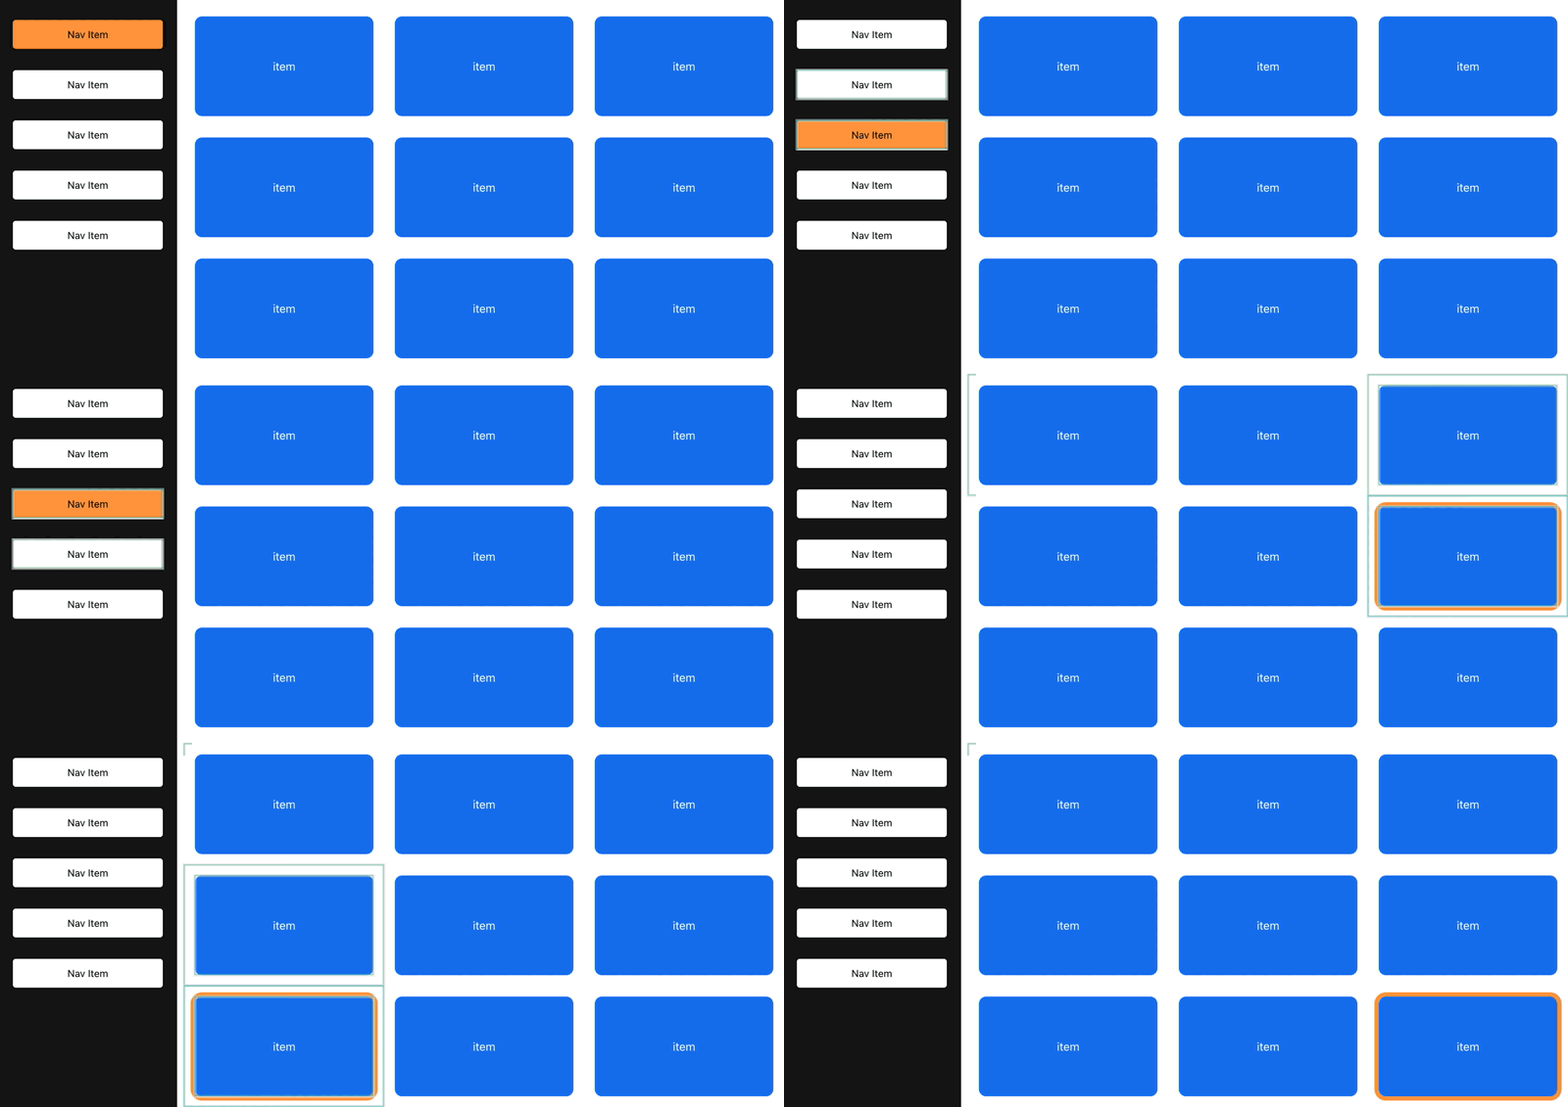
Focused 여부에 따라 스타일을 변경해보자.
useFocusable hook 의 focused 는 해당하는 컴포넌트가 포커스되었는지 true / false 반환합니다.
이를 이용해서 포커스 된 엘리먼트에 스타일을 더해줄 수 있습니다.

본 예제에서는 styled-components 를 사용했습니다. styled-components 를 사용하면 아래의 코드처럼 useFocusable 훅의 focused 로 props를 전달해 사용할 수 있습니다.
import styled from 'styled-components';

const NavItemContainer = styled.div<{ focused: boolean }>`
	...
  background: ${({ focused }) => (focused ? '#ff9c45' : '#ffffff')};
`;

const NavItem = () => {
  const { ref, focusKey, focusSelf, focused } = useFocusable();

  useEffect(() => {
    focusSelf();
  }, []);

  return (
    <FocusContext.Provider value={focusKey}>
      <NavItemContainer ref={ref} focused={focused}>
        <div>Nav Item</div>
      </NavItemContainer>
    </FocusContext.Provider>
  );
};
styled-components를 사용하지 않는다면 focused 를 토글형태로 클래스를 지정해 사용할 수 있습니다.
const NavItem = () => {
  const { ref, focusKey, focusSelf, focused } = useFocusable();

  useEffect(() => {
    focusSelf();
  }, []);

  return (
    <FocusContext.Provider value={focusKey}>
      <NavItemContainer ref={ref} className={focused ? 'item-focused' : 'item'}>
        <div>Nav Item</div>
      </NavItemContainer>
    </FocusContext.Provider>
  );
};.item-focused {
background: #ff9c45;
}자식요소가 focused 상태인지 알아보자.
부모 컴퍼넌트에서 자식요소가 focused 상태인지 알아야 할 상황이 있을 수 있겠죠?
그럴 때 useFocusable Hook 의 hasFocusedChild 를 이용할 수 있습니다. 단, trackChildren 옵션이 true 일 경우에만 동작하므로 잊지말고 작성해주도록 합니다.
const { ref, focusSelf, focusKey, hasFocusedChild } = useFocusable({
  trackChildren: true,
});SideNav에 hasFocusedChild 를 활용해 스타일을 추가했습니다. 🙂 방법은 NavItem 과 동일합니다.
const SideNavInner = styled.div`
	...
  background: #121212;
  &.has-focused-child {
    background: #59b94a;
  }
`;

const SideNav = () => {
  const { ref, focusSelf, focusKey, hasFocusedChild } = useFocusable({
    trackChildren: true,
  });

  ...
  return (
    <FocusContext.Provider value={focusKey}>
      <SideNavContainer ref={ref}>
        <SideNavInner className={hasFocusedChild ? 'has-focused-child' : ''}>
          {items.map((item, i) => (
            <NavItem key={i} />
          ))}
        </SideNavInner>
      </SideNavContainer>
    </FocusContext.Provider>
  );
};
Spatial-Navigation에 대한 내용은 여기까지입니다.
참고한 글, 문서
이 외에도 다양한 기능들이 있으니 아래 링크에서 자세하게 살펴보시는 것을 추천드립니다.
Norigin-Spatial-Navigation
react-spatial-navigation
React.js Example - react-hooks-based-spatial-navigation